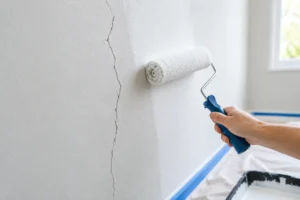
A few loose flakes on a window trim board can quickly become bare wood, soft siding, or a repair project that costs more than expected. Understanding why paint peels outdoors helps you address the real source of the problem instead of applying another coat that may fail just as quickly.
Exterior paint is a protective system, not simply a finish. It has to adhere to a clean surface, expand and contract through changing temperatures, shed water, and stand up to sun exposure. When any part of that system breaks down – often because of moisture or inadequate preparation – paint can lose its grip.
Why Paint Peels Outdoors: The Main Causes
Peeling paint is usually a symptom. The visible failure may appear on a fascia board, porch railing, brick wall, door frame, deck, or siding, but the cause can be hiding beneath the surface or behind it.
Moisture gets behind the paint film
Moisture is one of the most common causes of exterior paint failure in Niagara homes. Rain can enter through open joints, failed caulking, roof leaks, damaged flashing, unsealed end grain, or gaps around windows and doors. Water vapor from inside the home can also move outward through poorly ventilated walls, bathrooms, kitchens, and attics.
Once moisture reaches the wood or masonry beneath the paint, it creates pressure as temperatures and humidity levels change. The paint may bubble first, then crack or pull away in larger sheets. On wood, repeated wetting and drying can cause swelling, shrinking, and splitting that further weakens adhesion.
Painting over a damp surface rarely solves the problem. The new coating may look good for a short time, but trapped moisture remains and can push it off from underneath.
The surface was not prepared properly
Even premium exterior paint cannot compensate for a weak or contaminated surface. Old loose paint, chalky residue, dirt, mildew, grease, sanding dust, and weathered wood all interfere with adhesion.
Preparation should be matched to the surface condition. Peeling areas need to be scraped back to sound paint. Rough edges should be feather-sanded so the repaired section blends with the surrounding surface. Mildew needs treatment, not just a quick rinse, and weathered bare wood may need sanding and a suitable primer before topcoats are applied.
Pressure washing can be useful, but it is not a complete preparation method on its own. Used too aggressively, it can drive water behind siding, damage soft wood, or leave a surface too wet to paint. The surface must be clean and fully dry before coating begins.
Primer and paint were not compatible
Exterior surfaces often have a history. A previous owner may have used an oil-based coating, a latex product, a stain, or multiple repainting systems over the years. Applying the wrong coating over an existing finish can lead to poor bonding, cracking, or peeling.
Primer matters most where the surface changes. Bare wood, patched areas, exposed metal, masonry repairs, tannin-prone cedar, and previously stained surfaces may each need a specific primer. Skipping this step can leave the finish coat without a stable foundation.
This is also why paint selection is not a one-product decision. A deck coating is not interchangeable with siding paint, and paint for masonry should be chosen with the wall’s moisture behavior in mind. The best product depends on the substrate, its current coating, exposure, and condition.
Sun and temperature wear the coating down
South- and west-facing surfaces receive the harshest sun exposure. Ultraviolet light gradually breaks down paint binders, causing fading, chalking, and brittleness. As paint becomes less flexible, it is more likely to crack when the material underneath expands in summer heat and contracts during cold weather.
Dark colors can add another consideration. They absorb more heat, which can make wood and composite materials move more dramatically. A dark finish can look striking, but on heavily exposed siding, trim, or doors, product choice and surface preparation become even more critical.
Painting in unsuitable conditions can create trouble from the first day. Very hot surfaces, direct blazing sun, high humidity, rain risk, or temperatures outside the coating manufacturer’s range can prevent paint from curing as intended. A dry-to-the-touch surface is not necessarily a properly cured one.
Wood decay and surface movement are underneath
Paint cannot stabilize rotted wood. If a trim board is soft, spongy, deeply cracked, or deteriorated at the bottom edge, coating it may hide the issue briefly but will not restore its structure. The same applies to loose caulking, failing joints, and damaged siding.
Exterior wood naturally moves with moisture changes. That is normal. Problems arise when open end grain, horizontal ledges, and unsealed joints allow excessive water into the material. Deck rails, fence tops, window sills, and lower trim boards are especially vulnerable because they collect or absorb water repeatedly.
Before repainting, damaged materials should be repaired or replaced, gaps should be addressed with appropriate exterior sealant, and vulnerable areas should be primed and coated carefully. Repair work is not an extra step when the substrate has failed – it is part of a durable paint job.
Reading the Pattern of Peeling Paint
The location and shape of peeling can offer useful clues. Paint lifting near window corners, rooflines, or horizontal trim may point to water entry from above. Failure concentrated on a bathroom exterior wall or near an attic can suggest ventilation issues. Peeling limited to one painted repair area may indicate a primer or compatibility problem.
Large sheets of paint coming off down to bare wood often signal poor adhesion between coats or paint applied over an unprepared surface. Small blisters that burst and peel can indicate moisture. Fine cracking and flaking on a sunny wall may be related to age, UV exposure, or an overly brittle coating.
These clues are helpful, but they are not a substitute for inspecting the full area. A professional assessment should look beyond the visible peeling to check caulking, gutters, flashing, trim condition, ventilation, and the existing coating system.
How to Fix Peeling Exterior Paint Properly
The right repair starts by correcting the cause. If there is a leak, failed gutter, missing flashing, or ventilation concern, that issue should be handled before painting. Otherwise, the same moisture path can damage the new finish.
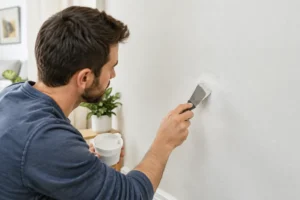
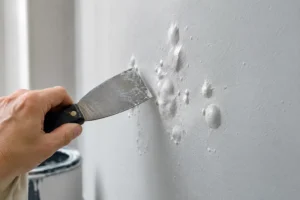
Next, remove all loose and failing paint. Stopping at the most obvious flakes is a common mistake because weak paint can extend farther than it appears. Sound paint can remain, but every loose edge needs to be scraped, feathered, and cleaned.
After the surface is dry and stable, repairs can be completed. That may involve replacing rotted trim, filling small exterior defects with an appropriate material, re-caulking joints, or treating mildew. Bare areas should receive the correct primer, followed by exterior-grade finish coats applied at the recommended spread rate.
Do not judge a repaint by how it looks on day one. Proper coverage, dry time between coats, weather conditions, and coating compatibility all affect how well it performs through future seasons. A fast coat over an unresolved problem can become an expensive repeat repair.
Preventing Exterior Paint From Peeling Again
Regular maintenance gives exterior paint its best chance to last. Keep gutters clear, direct downspouts away from walls, and watch for failed caulk around trim, windows, doors, and penetrations. Trim shrubs and climbing plants away from the house so surfaces can dry after rain.
Walk around the property each spring and fall. Look closely at lower trim, fascia, deck components, fence posts, window sills, and sun-exposed elevations. Small cracks, open joints, and early paint bubbles are far easier to address than widespread peeling.
For rental properties and homes being prepared for sale, early attention is particularly valuable. Peeling paint can affect curb appeal, signal deferred maintenance, and allow minor moisture problems to grow. A planned repair protects the property while keeping disruption more manageable.
At Qpainting Services, exterior work begins with the condition of the surface, not just the color selection. A clear scope should account for preparation, repairs, the right coating system, and a final walkthrough so you know what was completed and why.
If paint is peeling outdoors, treat it as useful information from your home. Find the moisture, preparation, or material issue behind it, correct that issue first, and your next finish will have a much better foundation to last.