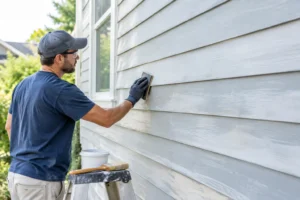
A newly painted wall should look smooth and stay that way. When raised blisters or bubbles appear, the problem is rarely just cosmetic. Paint bubbling causes can range from trapped moisture to poor surface preparation, and painting over the issue without finding its source usually leads to another failure.
For homeowners, landlords, and property managers, the right response depends on where the bubbling appears, how soon it developed, and what is behind the painted surface. A small bubble near a bathroom window calls for a different repair than widespread bubbling on exterior trim or a basement wall.
What Paint Bubbling Usually Means
Paint bubbles form when the paint film loses its bond with the surface beneath it. Air, water vapor, liquid moisture, or contaminants create pressure between the paint and the wall, wood, drywall, or masonry. The paint lifts rather than remaining firmly attached.
Some bubbles appear while paint is still wet. Others show up days, months, or even a full season after the project is complete. Timing is a useful clue. Immediate bubbling often points to application conditions, while delayed bubbling more often suggests moisture movement, failed caulking, a leak, or an underlying surface issue.
A bubble that feels dry and hollow may be an adhesion problem. One that feels soft, damp, or leaves a stained area when opened deserves closer attention before any repainting begins.
The Most Common Paint Bubbling Causes
Moisture behind the painted surface
Moisture is one of the most frequent reasons paint blisters. Water can reach a surface through a plumbing leak, roof issue, damaged flashing, failed window caulking, condensation, or damp masonry. In basements, moisture can also migrate through foundation walls and create pressure behind paint.
Bathrooms, kitchens, laundry rooms, and exterior walls near windows are common trouble spots. On exterior surfaces, peeling and bubbling paint around soffits, fascia, doors, and trim may indicate water is getting in from above or behind the material.
The repair is not simply to scrape and repaint. The moisture source must be corrected first, then the area needs enough time to dry fully. Depending on the severity, drywall repair, stain-blocking primer, caulking replacement, or exterior wood repair may be part of the proper scope.
Painting over a dirty or glossy surface
Paint needs a clean, sound surface to bond correctly. Grease, cooking residue, smoke film, dust, hand oils, wax, and some cleaning products can interfere with adhesion. This is especially common on kitchen cabinets, doors, trim, and walls near cooking areas.
Glossy older paint can create a similar problem. If the surface is not cleaned and lightly sanded or properly primed, the new coat may sit on top without getting a reliable grip. It can look acceptable at first, then lift or bubble after temperature changes, humidity, or everyday cleaning.
Preparation takes time, but it protects the finish. A professional painting process should include cleaning, sanding where needed, repairs, and the correct primer for the surface and coating being used.
Applying paint in poor temperature or humidity conditions
Paint does not dry at the same rate in every condition. High humidity slows evaporation and can trap moisture in the coating. Excessive heat can dry the top layer too quickly, leaving the paint beneath it unable to cure evenly. Direct sunlight on exterior siding or doors can create this issue even when the air temperature seems reasonable.
Cold weather brings different risks. Paint may not cure correctly when temperatures drop below the product’s recommended range, particularly overnight. In the Niagara region, spring and fall weather can shift quickly, so exterior projects need to be scheduled with both daytime and nighttime conditions in mind.
Good painters monitor the product requirements, the surface temperature, the forecast, and exposure to sun. There is a trade-off here: moving quickly may seem convenient, but waiting for suitable conditions is often the better choice for a durable result.
Coats applied too heavily or too quickly
A thick coat can skin over before the lower layer has released enough moisture or solvent. The result may be small blisters, wrinkling, or soft areas in the finish. Applying another coat before the first has reached its required recoat time can cause a similar failure.
This is why coverage rates and drying times matter. More paint is not automatically better paint. Multiple controlled coats, applied at the right thickness and allowed to dry properly, generally produce a stronger, more even finish than one heavy pass.
Incompatible paints or primers
Not every coating works over every existing finish. For example, applying certain water-based paints over a poorly prepared oil-based surface can create adhesion problems. Masonry, bare wood, previously stained surfaces, metal, cabinets, and patched drywall each may require a specific primer or coating system.
This does not mean every repaint requires stripping down to bare material. Often, sound existing paint can remain in place after cleaning, sanding, and spot priming. The key is testing the condition of the old coating and selecting materials that are compatible with it.
Heat, sun exposure, and vapor pressure
Exterior paint bubbling can occur when heat draws moisture or vapor outward through siding, trim, or masonry. Dark colors, strong afternoon sun, and poorly ventilated areas can make the effect more noticeable. Fresh paint applied in direct sun is particularly vulnerable because the outer surface can dry too fast.
In some cases, the paint itself is not the main problem. The building assembly may be holding moisture due to limited ventilation, a leak, or water-damaged material. Repainting alone will not stop recurring bubbles if the substrate continues to stay wet.
How to Diagnose Bubbling Paint Before Repairing It
Start by looking for patterns. Is the bubbling isolated to one wall, clustered near a window, or spread across an entire ceiling? Is it located beside plumbing, below a roofline, or on an exterior wall that receives intense sun? The location often narrows down the likely cause.
Next, carefully remove a small loose section if it can be done safely. Check whether the substrate is dry, stained, soft, moldy, chalky, or damaged. On drywall, press gently around the affected area. Softness or movement can indicate water damage that needs repair before painting resumes.
Also consider the project history. If bubbling started within hours of painting, ask about weather, ventilation, coat thickness, and drying time. If it appeared months later, inspect for water entry, condensation, or changes in the room’s humidity.
For a rental property or pre-sale project, it can be tempting to patch the visible bubbles quickly. That may be reasonable for a small, confirmed adhesion issue. When moisture is suspected, however, a cosmetic patch can hide a developing repair problem and lead to more disruption later.
The Right Way to Repair Paint Bubbles
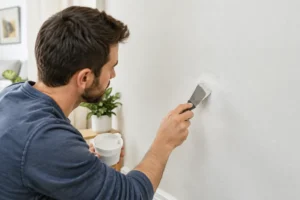
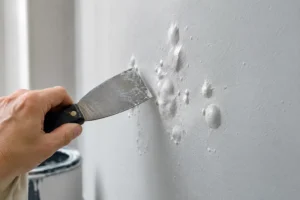
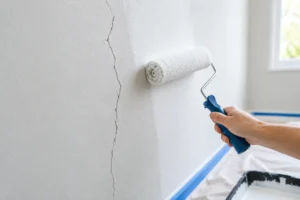
Once the source is corrected and the surface is dry, loose or bubbled paint should be scraped back to a stable edge. The area is then sanded smooth, cleaned of dust, repaired as needed, and primed with a suitable product. Finally, the finish coat is applied in controlled, even layers.
The exact scope depends on the surface. A wall may need drywall compound and spot primer. Exterior trim may need failed caulking removed, bare wood sealed, and surrounding loose paint stabilized. A cabinet door may require more extensive cleaning and sanding because kitchen residues and factory finishes can resist paint adhesion.
If bubbling covers a large area, the repair may involve more than spot work. Broad failure can mean the prior coating system is no longer sound, or that moisture has affected a wider section of the surface. A careful assessment prevents spending money on a repaint that will not last.
When It Is Time to Call a Professional
Professional help is worthwhile when paint bubbles keep returning, the affected area is damp or stained, exterior wood appears soft, or the damage is near roofing, windows, plumbing, or a foundation wall. These are signs that painting may be only one part of the needed repair.
Qpainting Services can assess the condition of the surface, explain whether repair and preparation are needed, and provide clear upfront pricing before work begins. For occupied homes and rental turnovers, an organized repair-and-paint plan also helps limit unnecessary disruption.
A smooth paint finish starts well before the brush or roller comes out. If bubbling is visible, give the surface a proper diagnosis first. Correcting the cause before applying new paint is the best way to protect your property and get a finish that stays clean, secure, and durable.