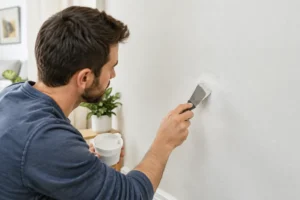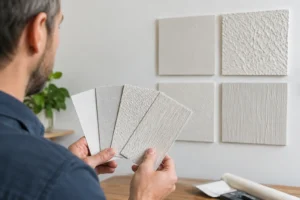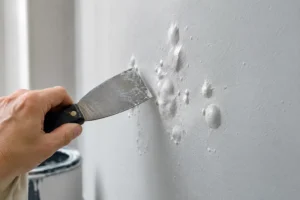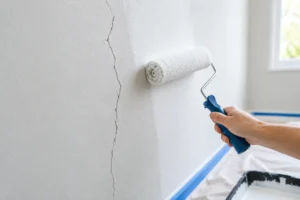
A drywall patch can be structurally sound, smoothly sanded, and perfectly painted, yet still stand out the moment afternoon light hits the wall. The difference is usually texture. This guide to matching drywall textures explains how to identify the finish on your walls, choose a realistic repair approach, and avoid the common shortcuts that leave a visible patch behind.
For homeowners, landlords, and property managers, texture matching matters because repaired areas should look intentional, not repaired. Whether the damage came from a moved picture frame, plumbing work, a tenant turnover, or a renovation, the goal is a consistent finish that blends into the room without creating unnecessary disruption.
Start by Identifying the Existing Texture
Texture names are useful, but the wall itself is the final reference. Previous repairs, age, paint buildup, and lighting can all change how a standard texture appears. Look at an intact section of wall near the damaged area, then look at it from several angles rather than straight on.
Natural light is especially revealing. Stand beside the wall and let light rake across the surface. This side view makes raised areas, depressions, roller patterns, and repeated texture shapes easier to see. If possible, compare more than one wall in the room. A feature wall or a wall near a window may show wear and paint variation that is not present elsewhere.
The most common residential drywall finishes include smooth wall, orange peel, knockdown, stomp brush, and popcorn ceiling texture. Smooth walls may still have a faint roller stipple under the paint. Orange peel has small, rounded bumps similar to citrus skin. Knockdown begins with sprayed texture that is lightly flattened, creating irregular low-profile islands. Stomp brush texture has a more pronounced repeated pattern, while popcorn is a heavier ceiling finish with a highly visible aggregate.
Why Drywall Texture Matching Is Harder Than It Looks
Texture is not just about the tool. It is the result of joint compound consistency, spray pressure, application angle, wall temperature, drying time, paint sheen, and the person applying it. Two painters can use the same texture material and create noticeably different results.
Paint also changes the appearance of a texture. A flat finish hides small variations better than satin or semi-gloss paint, which reflects light and emphasizes every high and low spot. On a wall with eggshell paint, an otherwise good texture repair can remain visible because the repaired section has a slightly different surface profile or because only the patch was repainted.
For this reason, matching a texture often requires more than applying compound to the patched area. The repair may need to extend beyond the original damage, and the final paint may need to cover the entire wall from corner to corner. That approach takes more preparation, but it usually produces the cleaner, more durable result.
Prepare the Patch Before Adding Texture
A texture coat cannot hide poor drywall repair. Before matching the finish, the patch must be firmly secured, taped where needed, and feathered smoothly into the surrounding wall. Any ridge around the repair will become more obvious once texture and paint are added.
The repair area should be clean, dry, and free of sanding dust. Primer is often helpful before texture, especially when exposed drywall paper, fresh compound, or a large repair is involved. It creates a more even surface so the texture does not dry differently in the patched section.
Feathering is where patience pays off. Rather than stopping compound at the edge of the patch, spread it outward in thin, wider passes. The goal is to eliminate a hard perimeter. On a smooth wall, this may mean feathering several inches or more beyond the repair. On a textured wall, the surrounding finish gives more visual cover, but the patch still needs to sit flat before texture is applied.
A Guide to Matching Drywall Textures by Type
Smooth wall and light roller stipple
Smooth wall repairs demand the most careful preparation because there is little texture to disguise imperfections. Use thin coats of joint compound, sand between coats with a fine abrasive, and inspect the area with a work light from the side. Avoid over-sanding the surrounding painted wall, which can leave a polished spot that accepts paint differently.
If the existing wall has a subtle roller stipple, the right roller cover and paint technique may restore much of that appearance. A thicker nap roller adds more texture than a short nap roller, but it can also create a finish that is too heavy. Test the roller and paint on a scrap board before committing to the wall.
Orange peel
Orange peel is commonly created with a spray texture product or hopper system. The size and density of the droplets must match the existing wall. Too much material creates large, sharp bumps. Too little creates a sparse pattern that disappears after paint.
A small test area is essential. Let it dry before judging it, since wet texture often looks heavier than it will after drying and painting. If the pattern is close, blend the spray slightly past the repair edge rather than creating a sharply defined textured circle.
Knockdown
Knockdown texture requires two stages: applying the texture and flattening it at the right time. If you knock it down too soon, the material smears. Wait too long, and it becomes difficult to flatten evenly. The finished pattern should have soft, irregular shapes rather than long drag marks or a uniform stamped appearance.
The timing depends on room temperature, humidity, and the thickness of the texture. This is one of the reasons knockdown repairs can be difficult for a first-time DIY project. A professional can adjust the material and working time based on site conditions, then blend the patch into the surrounding wall.
Stomp brush and other patterned textures
Repeated patterns require more than a similar-looking texture. They require the same spacing, direction, and overlap as the original. Study where the pattern begins and ends near corners, ceilings, and trim. A pattern that is rotated slightly or spaced too tightly can be visible even after painting.
For small repairs, it may be possible to recreate part of the pattern with the same style of brush. For larger sections, blending often means extending the work to a natural break, such as a corner, ceiling line, or trim edge. This prevents a patch boundary from cutting through the middle of a repeated design.
Popcorn ceilings
Popcorn ceiling repair is a separate category because the material is heavier and more difficult to blend. Water stains, loose texture, and prior paint can make a simple patch unpredictable. Before disturbing an older ceiling texture, have the material assessed if there is any possibility it contains asbestos. Do not sand, scrape, or scrape-test an unknown older texture.
When removal is appropriate, many property owners choose to remove the popcorn texture across the full ceiling instead of patching one area. That decision depends on the ceiling condition, the room size, budget, and whether a consistent modern finish is the priority.
Test First, Then Paint for Consistency
A sample board or hidden wall section can save time and frustration. Apply the proposed texture, let it dry fully, prime it if needed, and add the intended paint. This is the only reliable way to see how texture size, sheen, and color work together.
After the texture repair is complete, paint can make or break the blend. Spot painting may work if the paint is new, the color is exact, and the repaired area is very small. In many homes, however, existing paint has faded, been cleaned unevenly, or come from a different batch. Painting the full wall to a corner creates a more uniform result and avoids a visible color halo around the repair.
When to Call a Professional
Small nail holes and minor orange peel touch-ups can be manageable with careful testing. Larger holes, water damage, cracked seams, ceiling repairs, repeated patterns, and high-visibility walls are less forgiving. The same is true for repairs near windows, stairways, or strong overhead lighting, where every surface variation shows.
A professional drywall and painting contractor can assess the wall condition before recommending the repair scope. That includes determining whether the damage is cosmetic or connected to moisture, movement, or a failed previous repair. Clear preparation, texture matching, full-wall painting when needed, and a final walkthrough give property owners a better chance of a finish that holds up over time.
If a patch catches your eye before the room is even painted, it will likely be more noticeable after the furniture is back in place and the light changes. Taking the time to match the texture properly protects the appearance of the whole room, not just the repaired spot.