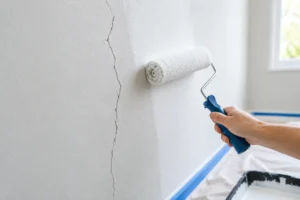
A fresh coat of paint cannot hide a wall that is loose, damp, cracked, or uneven. Learning how to prepare damaged walls helps you avoid peeling paint, visible patches, and a finish that looks worn far sooner than it should. The best results come from addressing the cause of damage first, then repairing and preparing the surface carefully before the first coat goes on.
Start by finding the cause of the damage
Not all wall damage is a paint problem. A nail hole from a picture frame is a straightforward repair. Stains, bubbling paint, crumbling drywall, or recurring cracks may point to a larger issue that should be corrected before painting.
Look closely for signs of moisture around windows, exterior walls, plumbing fixtures, basements, and ceilings below bathrooms. A brown or yellow stain, soft drywall, peeling paint, or a musty odor can indicate an active leak or condensation problem. Painting over it may improve the appearance briefly, but the damage will return if the source remains.
Cracks deserve the same attention. Fine hairline cracks are often caused by normal seasonal movement and can usually be repaired during prep. Wider cracks, cracks that continue to grow, or cracks paired with uneven walls may require a closer assessment. In a rental property or home being prepared for sale, it is tempting to move quickly. Still, a sound repair protects the finish and helps prevent a small concern from becoming a larger maintenance issue.
Protect the room before wall preparation begins
Wall repair creates more dust than most homeowners expect. Move furniture away from the work area, cover remaining pieces, and protect floors with drop cloths. Remove outlet covers, switch plates, curtain hardware, and wall decor rather than trying to cut around them later.
Good lighting matters. Daylight from a window can reveal dents and patched areas that overhead lights miss. A work light held at an angle across the wall is especially useful for finding ridges, shallow depressions, and leftover texture. Finding these flaws before painting is much easier than correcting them after a new color makes them more noticeable.
If the home was built before 1978 and old paint will be sanded, take lead-paint precautions and consider professional testing. For extensive repairs, water damage, or suspected mold, it is wise to bring in an experienced contractor rather than disturbing the area without a plan.
Clean the surface thoroughly
Paint needs a clean, stable surface to bond properly. Dust, hand oils, cooking residue, smoke film, and hairspray can all interfere with adhesion, even when the wall looks clean at first glance.
Begin by vacuuming loose dust from baseboards, corners, and damaged areas. Then wash the wall with a mild cleaner appropriate for painted surfaces. Kitchens, bathrooms, hallways, and rental units often need extra attention because these areas collect more grease, moisture, and fingerprints. Rinse away cleaner residue with a damp cloth and allow the wall to dry completely.
Do not skip this step because you plan to prime. Primer improves paint adhesion and coverage, but it is not a substitute for cleaning a greasy or dusty wall. A clean surface lets filler, primer, and paint do their jobs properly.
Repair holes, dents, and damaged drywall
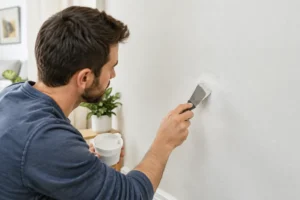
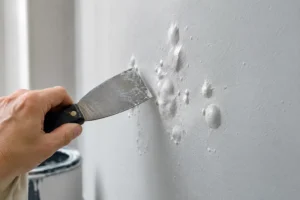
The right repair method depends on the size and depth of the damage. Small nail holes and shallow dents generally need lightweight spackle. Press it firmly into the opening with a flexible putty knife, then remove the excess so the patch sits nearly flush with the wall. Slight shrinkage is normal, so a second thin application may be needed after drying.
For deeper dents, larger screw holes, or small gouges, use a setting-type joint compound or quality patching compound. Build the repair in thin layers instead of applying one heavy coat. Thick filler can shrink, crack, or take much longer to dry.
Fixing larger holes
Holes larger than a few inches usually need more than filler. A drywall patch or backing piece creates support behind the opening, allowing joint compound to bridge the repair without sinking. Apply compound beyond the patch edges and feather it outward in progressively wider passes. This gradual transition is what keeps the repaired area from showing through the paint.
Damaged drywall tape is another common issue, particularly near corners, ceilings, and areas exposed to humidity. Remove any loose tape or crumbling compound before applying new tape and compound. Painting over lifted tape only seals in a failure that will remain visible.
For widespread wall damage, repeated patching, or uneven previous repairs, skim coating may be the better option. A thin coat of compound across a broader section can create a consistent paintable surface, but it requires technique and careful sanding. This is often where professional preparation saves time and produces a cleaner final result.
Sand for a smooth, even transition
Once repairs are fully dry, sand them until they blend into the surrounding wall. Fine-grit sandpaper is usually appropriate for finishing patches, while a sanding sponge helps follow subtle contours. The goal is not to sand aggressively. It is to remove ridges and create a smooth edge between the repair and the existing surface.
Run your hand across the area after sanding. Your fingertips often detect a raised edge that your eyes miss. Then inspect with angled light again. If a patch is still visible before primer, it will likely remain visible after paint.
Wipe away sanding dust with a vacuum and a slightly damp microfiber cloth. Dust left on the wall can weaken primer adhesion and leave a gritty texture in the finish. Give the surface time to dry if you use a damp cloth.
Use the right primer for the wall condition
Primer is especially valuable on patched drywall, repaired stains, bare joint compound, and walls changing from a dark color to a light one. Fresh patches are more porous than the surrounding painted wall. Without primer, they can absorb paint differently and create dull, flashing spots that stand out in certain light.
A standard drywall primer works well for clean, repaired areas. For water stains, smoke marks, tannin bleed, or other persistent discoloration, use a stain-blocking primer designed for that specific problem. If the stain came from a leak, make sure the leak is fixed and the wall is dry before priming.
Primer also helps when the existing paint is glossy. Lightly scuff-sanding a shiny surface, cleaning it, and applying an appropriate bonding primer can give the new paint a more reliable surface to grip. Skipping this preparation may lead to chipping around doors, trim, bathrooms, and high-touch areas.
Check the wall one more time before painting
After primer dries, inspect the wall again under both natural and artificial light. Primer has a way of exposing imperfections that were hidden by old color or uneven sheen. Mark shallow spots, pinholes, or rough edges with painter’s tape, make small touch-up repairs, and spot-prime those areas once they are dry.
This final inspection is where careful preparation pays off. A painting project can move quickly once the walls are clean, dry, smooth, and properly primed. Rushing past this stage usually creates more work later, especially when the paint sheen is satin, semi-gloss, or higher. These finishes reflect more light and reveal surface inconsistencies more readily than flat paint.
When professional wall preparation makes sense
DIY preparation can be practical for a few small holes and minor scuffs. The trade-off is time, dust control, and the learning curve involved in blending repairs so they disappear. Larger drywall damage, water staining, wallpaper removal, textured walls, and recurring cracks typically benefit from a professional assessment.
For homeowners, landlords, and property managers, Qpainting Services can assess wall conditions, include the required repairs in a clear scope of work, and prepare surfaces for a durable finish with minimal disruption. A proper final walkthrough also gives you the chance to review the completed work in the same light you will live with every day.
The wall beneath the paint determines how the room will look long after the project is finished. Give repairs the time they need to dry, inspect each surface closely, and paint only when the foundation is truly ready.