A crown molding painting service is not simply a small add-on to wall painting. Crown molding sits at one of the most visible lines in a room, where the wall meets the ceiling. When the finish is uneven, brush marks show, caulking has cracked, or paint bleeds onto the ceiling, the entire room can feel unfinished. When it is prepared and painted properly, crown molding gives the space a clean, intentional look that makes walls, ceilings, doors, and trim feel more complete.
For homeowners, landlords, sellers, and property managers, the goal is usually straightforward: crisp lines, durable coverage, clear expectations, and as little disruption as possible. Getting there requires more than choosing a white paint and opening a can.
Why Crown Molding Requires a Different Painting Approach
Crown molding has edges, curves, seams, and shadow lines that flat walls do not. Its profile catches light from windows and overhead fixtures, which makes missed spots and uneven sheen easier to notice. Even small issues can stand out once the room is fully lit.
The condition of the molding also matters. Older homes may have separated joints, nail holes, dried caulk, dents, water staining, or multiple layers of old paint. In rental properties and pre-sale projects, molding may have scuffs or poorly matched touch-ups from years of normal use. Painting over those problems can make them more noticeable rather than less.
A professional approach begins with assessing the surface, not rushing to apply a topcoat. The right preparation helps the new finish look smooth and stay in place through normal cleaning, seasonal movement, and daily wear.
What a Professional Crown Molding Painting Service Includes
The best scope depends on the room, the existing finish, and whether walls or ceilings are being painted at the same time. Still, a properly planned crown molding project generally includes careful protection, surface preparation, paint application, and a final quality check.
Protecting the Room Before Work Begins
Painting near ceilings, walls, floors, furniture, and window treatments calls for an organized setup. Floors and nearby surfaces should be protected, and furniture may need to be moved or covered before preparation starts. This is especially important in furnished homes, occupied rentals, and rooms that need to remain usable during the project.
A contractor should also explain what areas will be painted and where clean paint breaks will be created. If the walls are staying their current color, precision at the wall-to-molding edge becomes even more important. If walls and ceilings are also being updated, completing the work as one coordinated project can create a cleaner overall result and reduce repeat disruption.
Repairing and Preparing the Molding
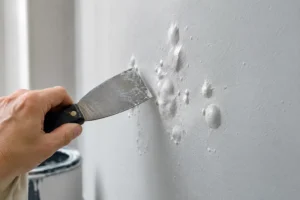
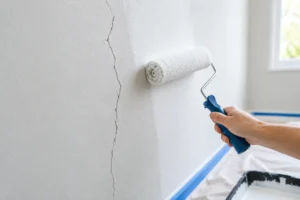
Preparation often determines whether trim paint looks professional six months later or starts to show flaws soon after the job is complete. Loose or cracked caulk should be removed or addressed, gaps should be filled where appropriate, and nail holes or small dents should be repaired. Sanding helps smooth previous brush marks, rough patches, and repaired areas so they do not telegraph through the new finish.
Not every imperfection can or should be treated the same way. A narrow hairline gap may be a normal result of seasonal movement, while a larger separation can point to a loose piece of molding or a more significant repair need. A dependable painting contractor will identify the difference and discuss the practical options before applying paint.
Cleaning is equally important. Kitchens can leave grease residue on upper trim, while bathrooms may have moisture-related staining. Dust, residue, and glossy old paint can interfere with adhesion. Where the surface needs it, proper cleaning, sanding, spot priming, or stain-blocking primer helps create a sound foundation for the finish coat.
Creating Crisp Lines and Even Coverage
Crown molding is typically painted with brushes, mini rollers, or a controlled combination of both. The right method depends on the molding profile and room conditions. Brushes are useful for detailed grooves and corners, while small rollers can help create an even finish across flatter sections.
The paint itself should suit the surface and the room. Many homeowners prefer a durable trim finish in satin or semi-gloss because it is easier to clean and provides a subtle contrast to flatter wall paint. Semi-gloss reflects more light and can highlight detailed molding, but it can also reveal surface flaws if preparation is skipped. Satin offers a softer look, though it may not provide the same level of washability in busy spaces.
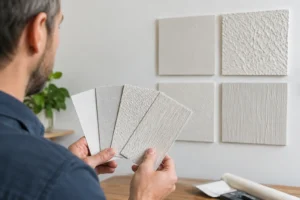
Color selection deserves some thought as well. Classic white crown molding remains a reliable choice because it brightens a room and works with many wall colors. That said, a soft off-white can coordinate better with warm walls, while a deeper trim color can create a more tailored design in formal rooms. The trade-off is that darker colors and higher sheens demand even more precision because flaws are easier to see.
When Crown Molding Should Be Painted With Other Surfaces
Standalone crown molding painting can make sense when the trim is scuffed, yellowed, stained, or simply needs a refresh. It is also useful during a rental turnover or before listing a property for sale, when targeted improvements can make a room look cleaner without a full renovation.
In many cases, however, it is more efficient to paint crown molding along with walls, ceilings, baseboards, doors, or window trim. This is particularly true if the wall color is changing. Fresh white molding against an older wall finish can make the wall look tired by comparison, and a newly painted wall can make worn trim more obvious.
Combining related work can also reduce setup time and protect the home from repeated project disruption. The best choice depends on the condition of each surface, the available budget, and the result you want from the room. A clear estimate should separate the work involved so you can make an informed decision rather than guess at the scope.
Common Problems That Should Not Be Painted Over
Some crown molding issues are cosmetic and can be corrected during normal prep. Others need more attention before painting begins. Water stains, for example, should be investigated before they are covered. If the source of moisture is still active, new paint will not solve the underlying problem.
Peeling paint can indicate poor previous adhesion, moisture exposure, or incompatible coatings. Painting directly over a failing surface often leads to more peeling. Likewise, heavily cracked joints or molding that has pulled away from the wall may require carpentry repair before a paint finish can look right.
It is also wise to look for uneven transitions where crown molding meets textured ceilings, wallpaper, or older wall repairs. These areas can usually be improved, but the expected finish should be discussed honestly. A professional painter can produce clean, careful results without promising that every older surface will become perfectly uniform.
How to Prepare Your Home for the Painting Appointment
A little preparation helps the project move efficiently. Remove small breakable items, wall decor near the work area, and valuables from furniture beneath the molding. If possible, clear a path to the room and make space around walls so painters can work safely.
Let the contractor know about recent leaks, previous paint problems, pets, access limitations, or rooms that need special scheduling. For landlords and property managers, confirm access arrangements and tenant communication before the start date. For sellers, consider scheduling painting before photography and staging so the refreshed trim supports the rest of the presentation.
You do not need to know every technical detail before requesting an estimate. A good contractor should assess the condition, explain the recommended prep, provide clear upfront pricing, and identify any items that could affect the scope before work begins.
Choosing the Right Crown Molding Painting Service
Price matters, but it should not be the only comparison point. A low quote can leave out preparation, repairs, protection, primer, or additional coats that are necessary for a durable result. Ask what is included, how damaged areas will be handled, what finish will be used, and how the final work will be inspected.
Communication is part of quality. You should know when the work will begin, what rooms will be affected, how the home will be protected, and what to expect during drying time. For occupied homes and managed properties, a clean work area and respectful scheduling are not extras. They are part of professional service.
Qpainting Services approaches crown molding and trim work with the same attention given to larger interior painting projects: careful prep, organized execution, clear pricing, and a final walkthrough to confirm the finish meets expectations. That process helps ensure the details are not treated as an afterthought.
Freshly painted crown molding can change the way a room feels without changing its layout, flooring, or furnishings. When the lines are crisp, the repairs are handled properly, and the finish is built to last, it becomes one of the quiet details that makes the whole property feel better cared for.