A wall can look like it only needs paint, yet a fresh coat often makes dents, seams, cracks, and water stains more noticeable. Finding the best solutions for damaged walls starts with identifying what caused the damage and choosing a repair that will hold up after the room is painted. The right approach protects both the appearance of the room and the life of the new finish.
For homeowners, landlords, sellers, and property managers, this matters because wall damage is rarely uniform. A few nail holes in a bedroom call for a different level of work than soft drywall below a leaking window or long cracks running from a door frame. A careful assessment prevents a cosmetic fix from becoming a repeat repair.
Best Solutions for Damaged Walls Start With the Cause
Before filling, sanding, or painting, look closely at the condition of the wall. Damage that is only on the surface can often be repaired quickly. Damage connected to moisture, movement, impact, or failing drywall needs more preparation.
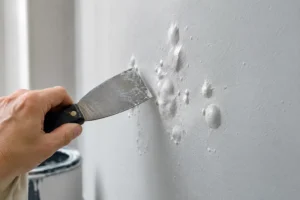
Small holes, picture-hook marks, and shallow dents are common in lived-in homes and rental units. These are usually repaired with a quality patching compound, applied in thin layers and sanded smooth once dry. Thin applications matter. A thick patch may shrink, crack, or leave a raised area that catches the light after painting.
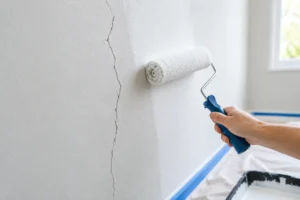
Cracks need more attention. Hairline cracks may result from normal seasonal movement, especially around trim, windows, doors, and corners. However, cracks that continue to open, spread across a wall, or appear with sticking doors and uneven floors may point to a larger movement issue. In those cases, repairing the wall without addressing the cause can be temporary at best.
Water staining, bubbling paint, soft drywall, or a musty odor should never be covered with primer and paint alone. The moisture source must be corrected first. That could mean a roof leak, plumbing issue, condensation problem, poor exterior sealing, or water entering around a window. Once the area is fully dry and any damaged material is removed, the wall can be rebuilt and sealed properly.
Match the Repair to the Type of Damage
Nail Holes, Scuffs, and Minor Dents
Minor damage is often the most straightforward repair, but it still benefits from careful surface preparation. Loose paint should be removed, the area should be filled, and the patch should be sanded until it blends into the surrounding drywall. A spot prime helps create an even surface before the final paint is applied.
This is a practical option before listing a home, completing a rental turnover, or refreshing a room that has seen years of furniture marks and artwork changes. The goal is not simply to make holes less visible. It is to leave a wall that looks consistent from every angle.
Medium Holes and Damaged Corners
A doorknob hole, an impact from moving furniture, or crumbling drywall at an outside corner usually requires reinforcement. Depending on the size and location, the repair may involve a patch, joint compound, drywall tape, or a new corner bead. The repaired area then needs to be feathered beyond the immediate damage so it does not show as a flat, obvious patch under a fresh coat of paint.
Corners deserve special attention because they are high-contact areas. A repair that looks acceptable on the day it is completed can chip quickly if the corner bead is loose or the compound is not properly built up. For busy hallways, stairwells, and rental properties, a durable corner repair is worth the additional preparation.
Large Holes and Missing Drywall
When drywall is broken through, water-damaged, or missing, filling the opening with compound is not a reliable answer. The damaged section should be cut back to solid material, replaced with properly supported drywall, taped, and finished in multiple coats. Each coat needs adequate dry time before sanding and applying the next layer.
The trade-off is time. Larger repairs require more than one visit or more than one workday because drywall compound and primers need to dry fully. Rushing this process can lead to visible seams, cracking, or flashing, where repaired areas reflect light differently than the rest of the wall.
Cracked Seams and Peeling Tape
A straight crack along a drywall joint is often caused by failing tape. Simply spreading compound over the crack may hide it briefly, but the issue can return as the loose tape continues to move. A longer-lasting repair typically involves removing compromised material, applying new tape where needed, and finishing the joint with thin, feathered coats of compound.
This type of work is particularly noticeable on ceilings and in rooms with direct lighting. Proper sanding and priming make the difference between a repair that disappears and one that remains visible every time sunlight hits the wall.
Water Damage and Stains
Water damage requires a more cautious process because the visible stain may be smaller than the affected area behind it. If drywall is soft, swollen, moldy, or unstable, removal and replacement are often necessary. If the drywall remains solid after the leak is fixed and the area has dried completely, staining can sometimes be sealed with the appropriate stain-blocking primer before painting.
Do not rely on standard wall paint to cover a water stain. Without the right primer, discoloration can bleed through the finish. More importantly, paint should not be used to hide an active moisture problem.
Why Preparation Determines the Final Finish
Painting is the last step, not the repair itself. Even high-quality paint cannot level a rough patch, secure peeling drywall tape, or stop a stain from returning. A wall needs to be clean, dry, sound, smooth, and properly primed before the finish coat goes on.
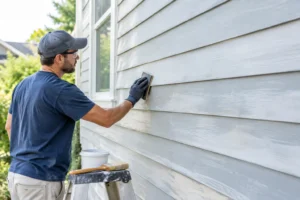
Professional preparation commonly includes protecting floors and furnishings, removing loose material, repairing the wall, sanding between coats, controlling dust, spot priming repairs, and checking the surface under changing light. This approach takes more care than a quick paint-over, but it produces a more even and durable result.
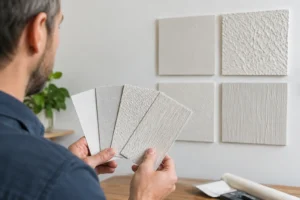
Paint sheen also affects how much a repair shows. Flat paint can help conceal small wall imperfections, while eggshell, satin, and semi-gloss finishes reflect more light and demand more precise patching. A kitchen, bathroom, hallway, or rental property may benefit from a more washable finish, but the wall preparation needs to match that choice.
When a Professional Repair Is the Better Choice
A homeowner can often handle a few small nail holes. Professional help becomes especially valuable when damage is extensive, the cause is uncertain, walls have texture, repairs are near ceilings or high stairwells, or the room needs a polished finish for sale or occupancy.
It can also make sense when several services need to happen together. For example, an older room may need wallpaper removed, damaged drywall repaired, popcorn texture addressed, trim refreshed, and walls painted. Coordinating the preparation and finishing as one scope helps prevent gaps between trades and reduces disruption to the property.
At Qpainting Services, wall repair is approached as part of the complete painting process, not as an afterthought. Clear scope, careful preparation, clean work areas, and a final walkthrough give property owners a better understanding of what is being repaired and what the finished space should look like.
A Practical Plan Before You Paint
Walk through the room in daylight and again with lamps on. Mark dents, cracks, stains, loose tape, bubbling paint, and areas where the wall feels soft. Note whether damage is isolated or repeating in more than one location. Repeated damage near windows, plumbing fixtures, exterior walls, or ceilings is a reason to investigate further before scheduling paint.
If you are planning a sale, tenant turnover, renovation, or general refresh, include wall repairs in the estimate from the beginning. This avoids surprises after painting starts and allows the work to be priced clearly. It also gives the repair enough time to dry, be sanded correctly, and receive the primer and finish coats it needs.
A well-repaired wall should not demand attention after the project is complete. It should simply look clean, solid, and ready to support a finish that makes the room feel cared for.