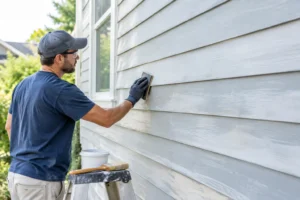
A wall dent can look minor until fresh paint catches the light and turns it into the first thing you see when entering a room. Whether it came from a door handle, moving furniture, an active household, or a rental turnover, the right way to fix wall dents is to repair the damaged surface before painting – not simply cover it with another coat.
The good news is that most shallow dents are repairable without replacing drywall. The key is matching the repair method to the depth of the damage, then taking the time to feather, prime, and paint the area properly. A smooth result depends far more on preparation than on the final paint coat.
Start by Checking How Deep the Dent Is
Run your hand over the damaged spot before reaching for filler. A small indentation with intact drywall paper is usually a straightforward patching job. If the surface feels soft, the drywall paper is torn, or there is a crack spreading from the dent, the repair needs more attention.
Light dents often come from furniture impacts or door knobs. These can usually be filled with lightweight spackle or joint compound. Deeper dents may have crushed the gypsum beneath the surface paper. In that case, applying too much compound at once can lead to shrinking, cracking, or a repair that remains visible after painting.
Also look for signs of a bigger issue. Repeated dents beside a door may mean the door stop needs adjustment. Damage near an exterior wall, window, or plumbing fixture may warrant a closer look for moisture. Filling a dent without addressing the cause can create the same repair project again a few months later.
Materials You Need to Fix Wall Dents
For a typical small repair, use a flexible putty knife, fine-grit sanding sponge, drywall compound or lightweight spackle, primer, and matching wall paint. A damp microfiber cloth is useful for removing dust before priming.
Choose the filler based on the job. Lightweight spackle works well for pinholes and very shallow dents because it dries quickly and sands easily. All-purpose joint compound is generally a better choice for wider or deeper damage because it feathers into the surrounding drywall more smoothly. For dents that are deep enough to require multiple coats, joint compound gives you more control over the final surface.
A sanding sponge is often easier than folded sandpaper because it follows the contour of the wall without digging into one spot. Use fine grit, usually 180 to 220, and work gently. Aggressive sanding can expose drywall paper or create a flat, obvious patch around what was originally a small dent.
Do not skip primer
Fresh drywall compound absorbs paint differently than the existing painted wall. If you paint directly over a repair, the patched area may look dull, flash through the finish, or show a different sheen at certain angles.
Spot-prime the repaired area after sanding and dust removal. Once the primer is dry, inspect the wall from the side with a lamp or natural light. This simple step reveals ridges and low spots before you commit to the finish coat.
How to Repair Small and Shallow Dents
Begin by removing any loose paint, dust, or raised edges around the damaged area. If a sharp impact has pushed up a ridge around the dent, lightly sand that ridge first. The goal is not to enlarge the repair. You simply want a clean surface where the filler can bond.
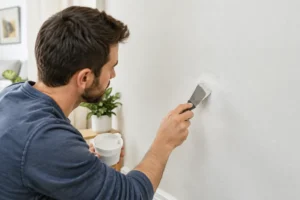
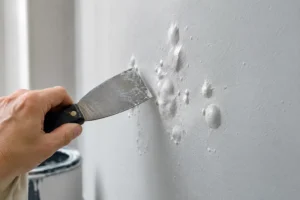
Apply a small amount of spackle or joint compound with a putty knife. Press the material into the dent, then pull the knife across the surface with light pressure. Keep the center filled while extending a very thin layer slightly beyond the damaged area. This gradual transition is called feathering, and it is what helps the patch disappear.
Let the filler dry completely according to the product instructions. Drying time changes with the product, thickness of the application, room temperature, and humidity. A compound that feels dry on the surface may still be soft underneath, so do not rush the sanding stage.
Sand the repair lightly until it feels level with the wall. Close your eyes and run your fingertips across the area. Your hand will often identify a raised edge that is difficult to see. If the dent is still visible, apply a second thin coat rather than trying to force the repair level with heavy sanding.
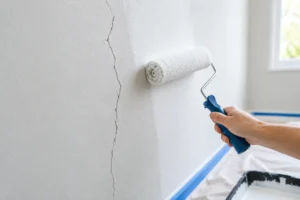
After the final coat is smooth, wipe away dust, spot-prime, and apply paint. For best blending, use the same paint color and sheen already on the wall. Even an exact color can look different if the wall has aged, faded, or been cleaned unevenly over time.
Repairing Deeper Wall Dents Without Creating a Bulge
A deeper impact dent needs to be built up in thin layers. Start by pressing joint compound firmly into the lowest point of the damage. Keep the first coat slightly below the finished wall surface. This creates a stable base and reduces the chance of shrinkage as the compound dries.
Once dry, sand only the high points and add a wider second coat. Each coat should extend farther beyond the center than the one before it. This broad feathered area makes the repair read as part of the wall rather than as a round patch.
For a dent with torn drywall paper, first trim away only the loose fibers. Seal exposed brown paper with a suitable primer before applying compound. Unsealed paper can bubble when it absorbs moisture from the patching material, creating more work and a less durable repair.
If the drywall is cracked, punctured, or crushed over a larger area, a simple fill may not be enough. The damaged section may need a drywall patch, reinforcing tape, or replacement material. This is where an apparently small wall issue can become a more involved repair.
Why a Paint Touch-Up Can Still Show
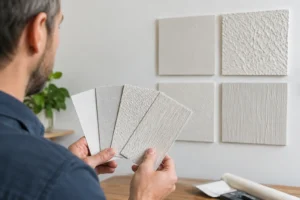
Many homeowners repair the dent successfully, then are disappointed when the painted area remains noticeable. That does not always mean the patching was poor. Paint blending is affected by sheen, application method, wall texture, and the age of the existing finish.
Flat paint is the most forgiving for touch-ups. Eggshell, satin, and semi-gloss finishes reflect more light, which makes slight texture differences easier to see. Rolling a small patch can also leave a different texture from the rest of the wall if the nap thickness or paint application differs.
When the wall has a noticeable sheen or has been painted for several years, repainting from corner to corner is often the cleaner choice. Painting the full wall creates a consistent color, texture, and sheen instead of leaving a visible touch-up rectangle around the repair.
When to Call for Professional Drywall Repair
DIY repairs make sense for a few isolated dents in an accessible area. Professional help is worth considering when the damage is extensive, recurring, near moisture, or located on a highly visible wall where a perfect finish matters. Rental turnovers, pre-sale improvements, and occupied-home painting projects also benefit from having repairs and painting coordinated as one scope of work.
A professional can assess whether the dent is only cosmetic or whether the drywall has lost structural integrity. They can also match wall texture, repair multiple areas efficiently, protect nearby furnishings, and repaint the surface with fewer visible transitions.
For homeowners and property managers in St. Catharines and the Niagara region, Qpainting Services can combine drywall repair with careful interior painting, clear upfront pricing, and a final walkthrough focused on the finished surface. That approach avoids the common problem of repairing a wall one day and discovering later that the paint finish does not blend.
A well-repaired wall should not draw attention to itself. Take the extra time to build thin layers, inspect the surface in angled light, and prime before painting. If the damage is beyond a simple patch, arranging a proper assessment can protect both the appearance of the room and the durability of the finish.