A fresh coat of paint cannot hide a wall that is cracked, dented, patched poorly, or marked by old water damage. In fact, new paint often makes those imperfections easier to see, especially in rooms with natural light. Proper wall repairs create the smooth, stable surface needed for a finish that looks clean on day one and continues to look good after daily use.
For homeowners, landlords, sellers, and property managers, repairing walls is not just a cosmetic step. It is part of protecting the condition of the property, preparing for a tenant turnover, or making a home show better before it goes on the market. The right approach depends on the type of damage, the condition behind the wall, and the finish you want when the work is complete.
Wall Repairs Start With the Cause of the Damage
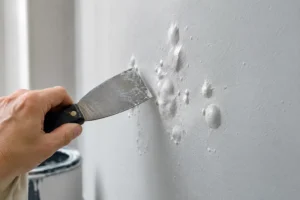
Small holes from picture hooks and minor scuffs are common in lived-in homes. They are usually straightforward to repair, but they still need careful filling, sanding, and priming before painting. Skipping those steps can leave a raised spot, a dull patch, or a visible outline under the new color.
Larger damage needs a closer look. A hole from a door handle, moving furniture, or an accidental impact may require a drywall patch rather than simple filler. Cracks can be caused by normal seasonal movement, but wide, repeating, or growing cracks may point to movement around framing, a settling issue, or moisture. Repairing only the surface without addressing the cause can lead to the same problem returning.
Water stains deserve particular attention. A brown mark on a ceiling or wall may come from an old roof leak, plumbing issue, condensation, or an active source of moisture. The area should be dry and the source corrected before repair begins. Once the drywall is stable, stained areas often need stain-blocking primer so discoloration does not bleed through the new paint.
Common Types of Wall Damage in Homes
Drywall is durable for everyday living, but it is not indestructible. Most interior repair work falls into a few familiar categories, and each one requires a different level of preparation.
Nail holes, dents, and small chips
These are typical after removing artwork, shelving, curtain hardware, or wall décor. They may look minor, but several small patches across one wall can become noticeable under a satin or eggshell finish. A professional repair fills the damage in thin layers as needed, sands it flush, and primes the repaired areas to create even paint absorption.
Cracks at seams and corners
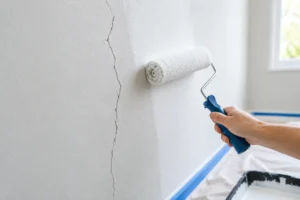
Hairline cracks along drywall joints, inside corners, and ceiling lines can appear as a house expands and contracts. Some can be repaired with the right joint compound and tape work. However, cracks that reopen shortly after repair should not be treated as a paint problem alone. The condition of the joint and any movement behind it should be assessed before the final finish is applied.
Larger holes and damaged drywall sections
A larger opening needs backing, a properly fitted drywall patch, taped seams, and multiple coats of compound. The goal is not merely to cover the hole. The repaired area must blend into the surrounding wall so it does not show as a square patch after painting. This is where patient sanding and surface leveling make a visible difference.
Peeling paint, bubbling, and water marks
Peeling paint can result from moisture, poor adhesion, previous surface contamination, or painting over an unstable finish. Loose material must be removed and the surface properly prepared before repainting. Painting directly over peeling areas may look acceptable briefly, but the new coating is only as dependable as the surface beneath it.
Why Paint Preparation Matters After Repair
Repair work and painting are closely connected. Even a well-filled hole can stand out if it is not sanded correctly or primed before the topcoat. Drywall compound is more porous than painted drywall, which means it can absorb paint differently and leave a flat-looking spot known as flashing.
A complete preparation process usually includes protecting floors and furnishings, removing loose material, repairing damaged areas, sanding for a smooth transition, cleaning dust, spot-priming repairs, and then applying the selected paint system. The exact scope varies by room. A high-traffic hallway with several dents may need more extensive prep than a bedroom wall with a few nail holes.
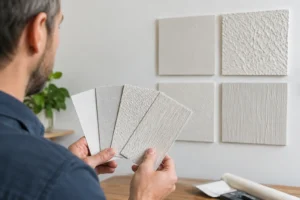
Paint sheen also affects how much repair work shows. Flat paint is more forgiving of minor texture differences, while eggshell, satin, and semi-gloss finishes reflect more light and can expose uneven areas. This does not mean a durable sheen should be avoided in busy spaces. It means the prep needs to match the finish and the lighting conditions in the room.
When a Simple Patch Is Enough and When It Is Not
Not every imperfection calls for a major drywall project. Small, isolated holes and shallow dents can often be repaired efficiently before repainting a wall or room. This is a practical choice for rental turnovers, touch-ups before listing a property, or refreshing a space that is otherwise in good condition.
More extensive work is appropriate when damage is widespread, walls have several old patches, seams are failing, or texture has been disturbed. In those cases, spot repairs may create a pieced-together appearance. Skim coating sections of wall, replacing damaged drywall, or repainting the full wall can provide a more consistent result.
There is also a budget and timing consideration. Repairing one damaged area may cost less upfront, but repainting only around a patch can be difficult if the existing paint has faded or if the original color is unknown. Painting from corner to corner is often the better visual solution. A clear estimate should explain whether the repair includes touch-up work, a full wall repaint, or preparation for painting an entire room.
Professional Wall Repairs Reduce Disruption
Wall repair can create dust, noise, and temporary inconvenience, particularly when sanding or replacing drywall. An organized contractor plans the work to keep disruption manageable. That means protecting adjacent surfaces, containing dust where possible, maintaining a clean work area, and communicating what rooms will be affected and for how long.
This matters for occupied homes, rental properties, and busy households. A repair project should not leave owners guessing when a room can be used again or whether furniture needs to be moved. Clear expectations help prevent surprises, especially when repairs uncover additional damage behind a wall surface.
At Qpainting Services, repair work is approached as part of the complete painting process rather than an afterthought. The condition of the surface is reviewed before painting begins, so the scope can account for the preparation needed to achieve a durable, even finish. Clear upfront pricing and a final walkthrough help ensure the completed work matches the agreed-upon plan.
Preparing Your Home for Wall Repair Work
Before work begins, remove fragile items, wall décor, and small furnishings from the repair area. Larger furniture can often be moved or covered as part of the project plan. If there has been a leak, make sure the underlying issue has been addressed before scheduling cosmetic repairs.
It is also helpful to point out every area of concern during the estimate, including small cracks, prior patches, dents behind doors, and marks near windows or plumbing fixtures. Grouping repairs into one project can be more efficient than addressing them one at a time, particularly when painting is already planned.
For landlords and property managers, documenting damage between tenancies can help distinguish ordinary wear from repairs that need attention. For sellers, addressing obvious wall damage before photos and showings can make a room feel better maintained without requiring a full renovation.
A Better Finish Begins Below the Paint
Walls do a lot quietly. They take the marks of everyday life, hide old repairs, and frame every room in the home. When damage is handled with careful preparation rather than a quick cover-up, the final paint job looks more polished and lasts longer. If you are planning to refresh a room, preparing a rental, or getting a property ready to sell, start by making sure the walls are ready for the finish you want people to notice.